Masterbath Masterpiece

Okay!  We got the foyer done and the half bath up and running, so all the big time demolition was finished… or so we thought.  Up until that point, we were so very lucky to have our beloved friend, Esther, open up her gorgeous turn of the century, Victorian home to us.  All to keep us comfy and cozy in her house while all the destruction and construction was happening in ours.

Next on the list was to do something with that big wood paneling, acoustical tile filled addition to the back of the house.  But honestly, having to use the old dingy bathroom was turning out to be no fun at all.  After giving it much thought, we ultimately decided to invest in something that we would enjoy a little more every single day… a new master bathroom.

Now that all the guests had a place to potty on the first floor, we could finally turn the original bathroom into a true “master bath” masterpiece.

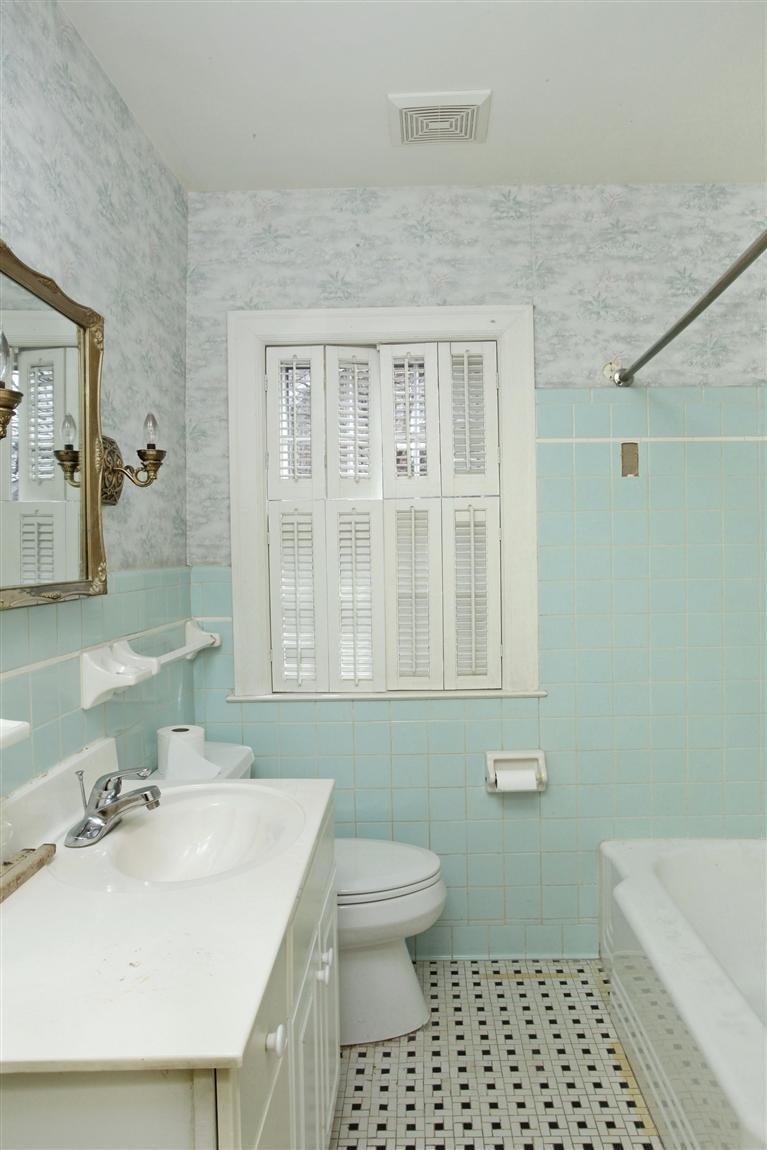
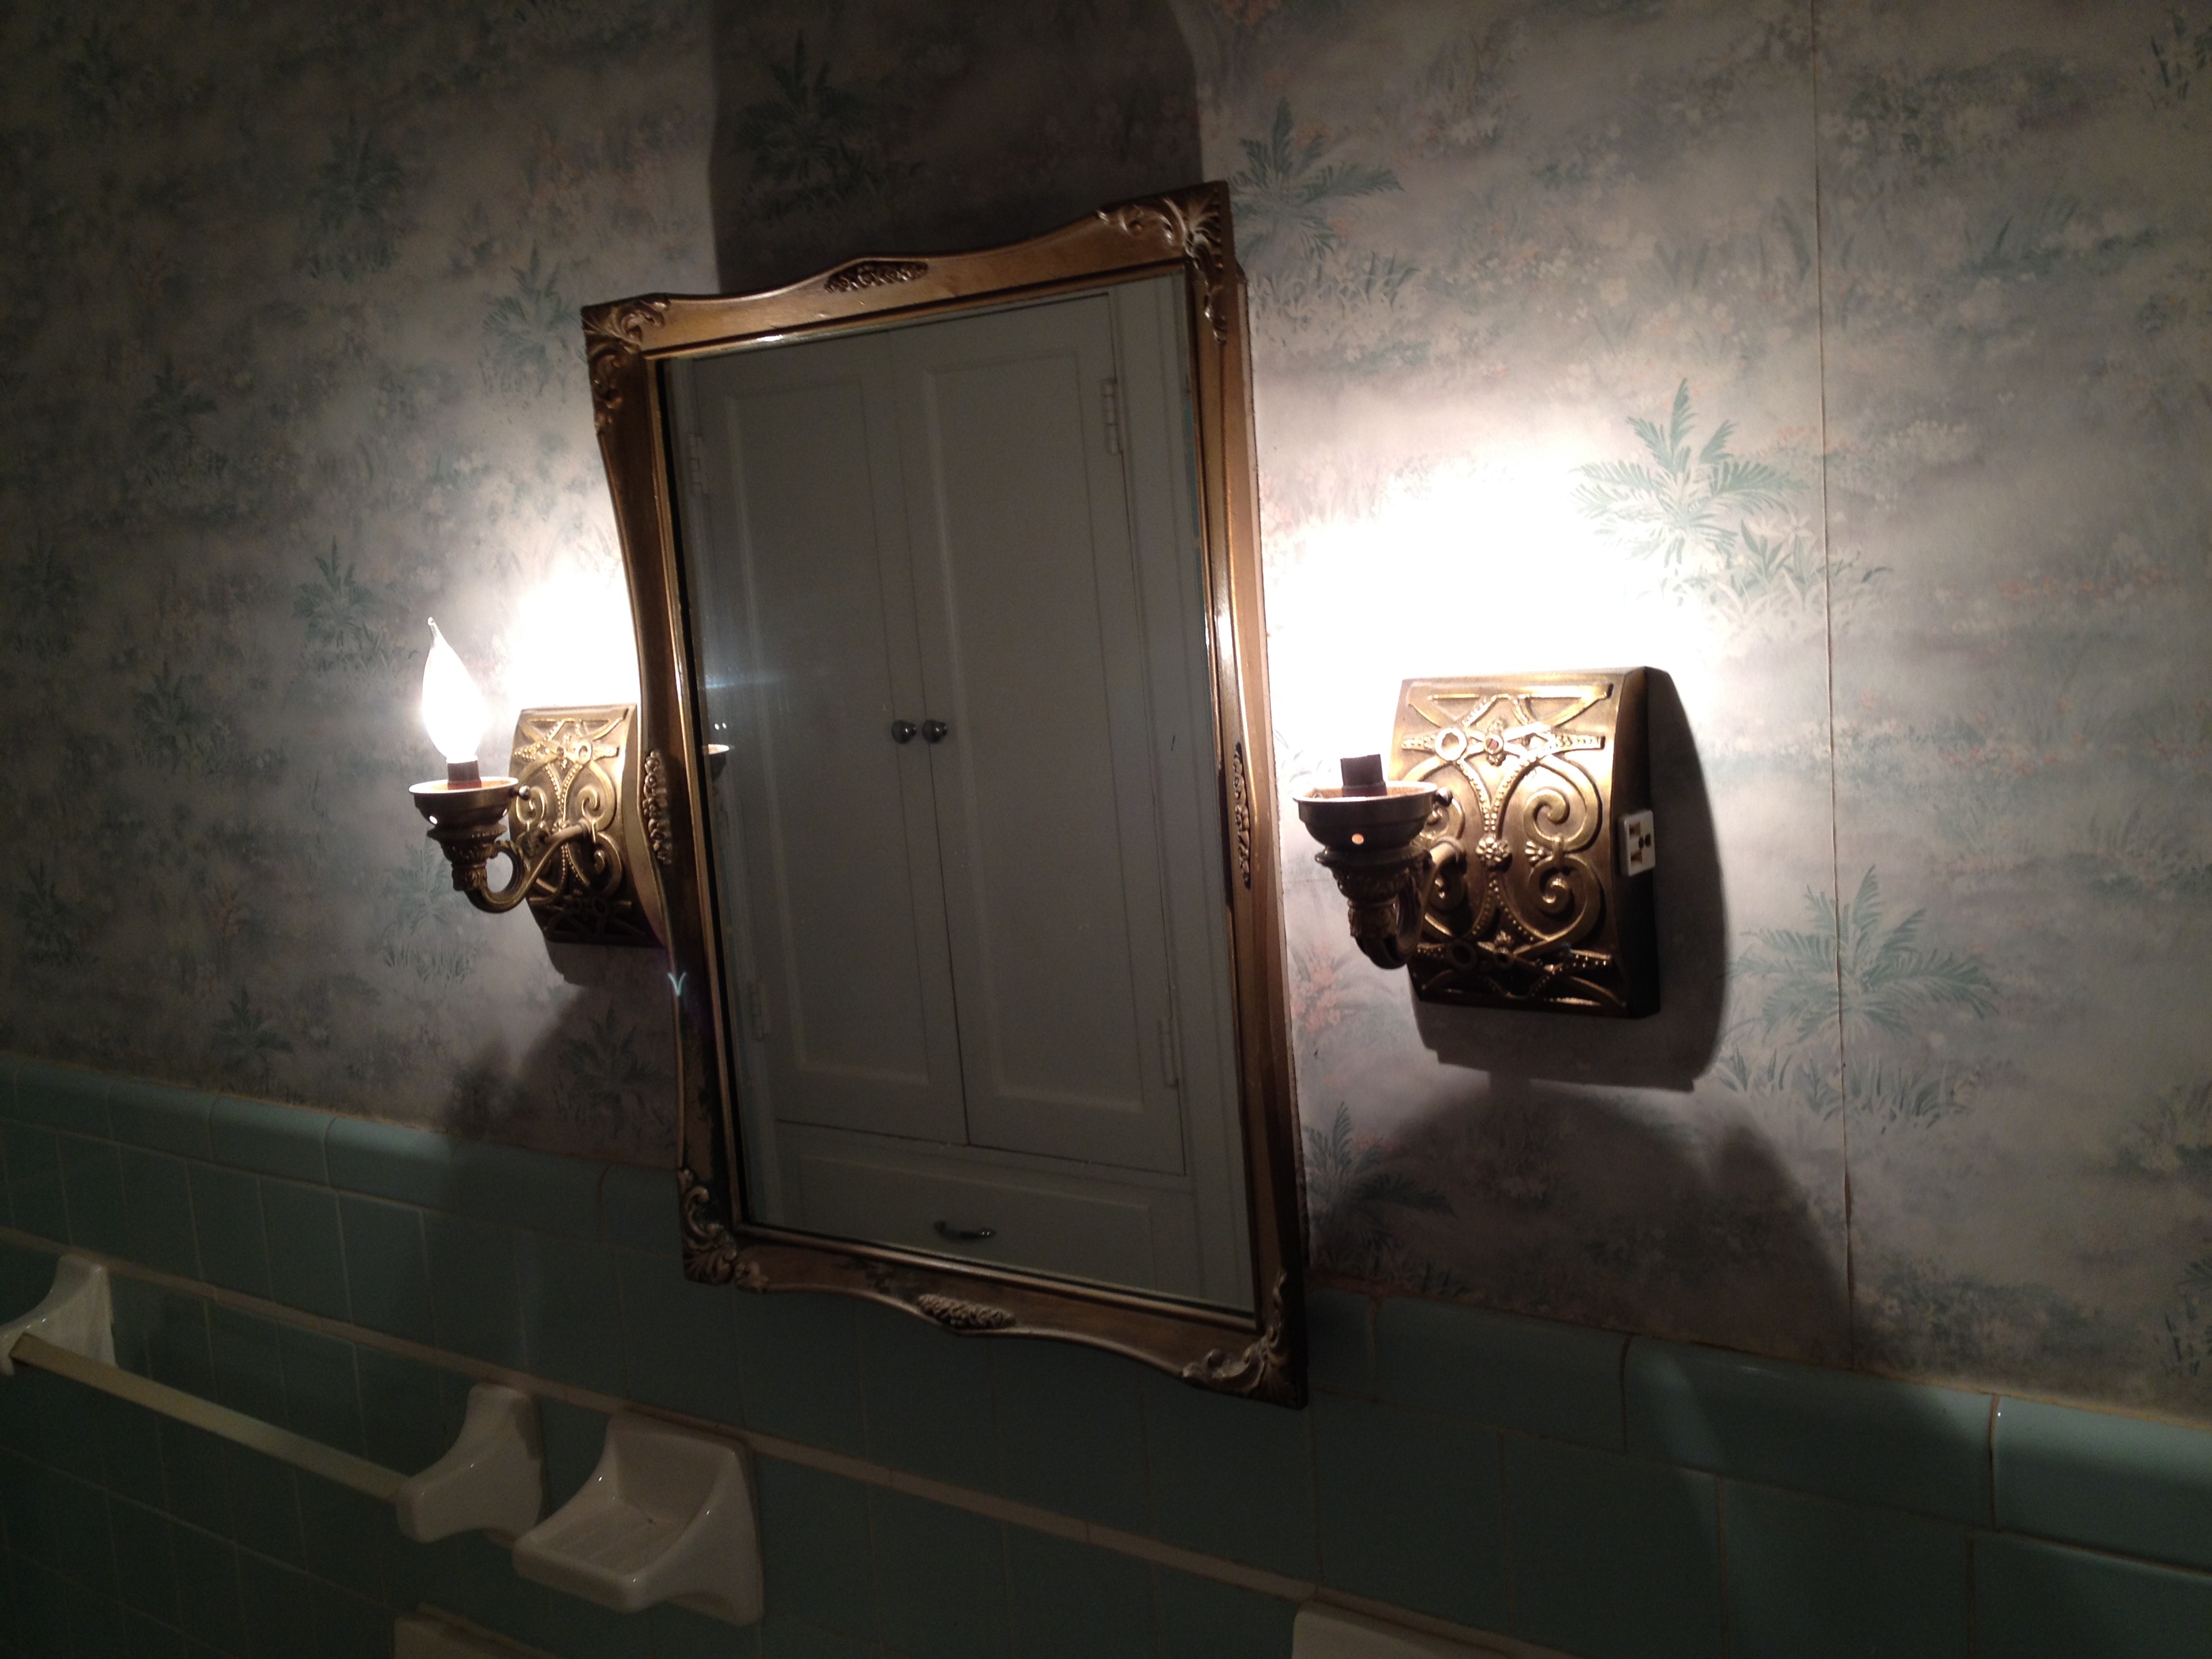
We’ve already told you about the original bathroom in detail in our previous blog, Ceramic Tile City.  In our post Bathroom Bliss we told you about what inspired us for this project including fixtures, color palettes, and finishes.  We tried to come up with the most functional layout with the then size, but unfortunately we just needed a little more room.  The decision was made to tear down the wall where the bathroom door and the built-in bookcase were and build a new wall in order to gain 10 inches of additional floor space.  Finally, it was time to move forward and say bye-bye to the glory that was the first floor bathroom.

If you’ve ever tackled home renovation project, you know that it’s the first couple of days that you notice the biggest difference.  We came home from work on day one to this…

We had no clue how they managed to get that big cast iron tub out of the house, and we’re not sure we even want to know.

Originally, the window was planned to be covered up so a walk-in shower could spread across the back wall with the new toilet and vanity against the right wall.  Before day 2 began, a last minute decision was made to give the whole design a literal 180 degree rotation.  That would provide an entrance directly from the bedroom and truly make this a master suite.

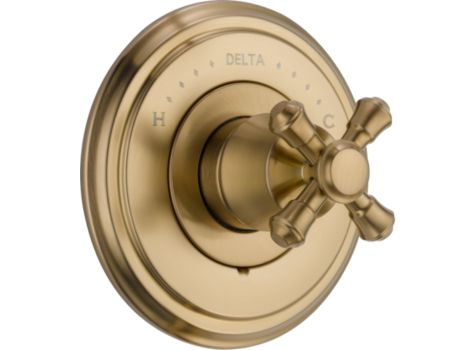
During our (extended) stay with Esther, we got all kinds of inspiration from one of her showers.  First, we chose to use a rain shower head that drops from the ceiling on the right side of the shower while the valve was placed on the left side.  This way, you can turn the water on and stand in the shower completely dry while your water warms up!  This also eliminated the need for a shower door.  Instead, we had a shower wall glass panel installed by our friend Doug from Showcase Showers.  This really opened up the entire space and saved us a lot of money on Windex.

Since the walk-in shower takes up so much space, we wanted to make it interesting.  We used tiles with an antique brass finish to trim out the entire shower and used marble tiles in a chevron pattern to create the feature wall.  This is usually the first thing people see when they walk in, so why not love it?

The bathroom walls were painted Repose Gray from Sherwin Williams to tie together the gray tones in the marble tile and vanity top.  The ceiling and trim are painted Snowbound, of course.  Using the vanity and lights we loved and an etagere for extra storage, we added the finishing touches.  Here’s the finished product!  We love it, it’s no million dollar bathroom, but we think it’s a master bathroom masterpiece…at least for us! 🙂

Bathroom Bliss

We needed a little inspiration.  Obviously, most people go straight to Pinterest for inspiration, which can be both good and bad, because you can find many things that are drop dead gorgeous, but they’re also drop dead expensive and sometimes do not work with the space you have.  We knew we wanted marble, masculine, and sexy.  We didn’t want to go too modern because of the style of the house, so we just wanted updated traditional.

Something we loved about this shower is how they used the different patterns of the same tile to create a textural backdrop in the shower.

In this bathroom, we loved the dark, dramatic feel.  We also liked the wood vanity against the dark floor and walls, but our space was way too small for a bathroom this dark.

We liked this bathroom for its country look and feel.  We knew we only had room for a single sink vanity and like the double doors on the cabinet.  We also like the sconces on each side of the mirror.

Probably the most inspiration we gained was from this stunning bathroom.  In the tile pattern, the warm gold accent mixed with the white and gray carrera marble created a color combination that was unusual and had a timeless feel.  We checked in to a tile similar to it, and it priced out at $40 a square foot.  That just wasn’t in our budget.

After we saw the gold/antique brass color with the white and gray marble, we knew we just had to do it but we weren’t for sure how to pull it off with the tile, the lights, and all the fixtures… until we found this!

prod691173_F11

Milk glass sconce from Restoration Hardware

Most of the light fixtures we could find were all nickel or chrome, and we knew we wanted something that looked like it was meant to be with the house.  We didn’t want to buy an older home, gut it with all of this super modern shiny stuff, and lose all of the charm we had been searching for in the beginning.  So this light fixture totally started the whole course for the the bathroom remodel.   We decided that we wanted to really use the antique brass as an accent with the entire bathroom, which we thought was going to be really hard, but it didn’t turn out that way.

When it came to tile, we knew we wanted carerra marble, but couldn’t spend a fortune on it.  Little did we know that there are other kinds of marble, that look very similar to carrera, but don’t come with the same price tags.  We also knew we wanted to do a different pattern in the back of the shower made out of the same material, and that some how we wanted some kind of antique brass detail.  We were a little concerned that the brass would seem odd coupled with the cold white and gray marble, but that’s when we found a white marble that had both gray and brown tones running through it! BINGO!

IMG_4435

Our plan was to use to the white marble subway tiles for all of the walls, and then use the herringbone tile mosaic as an inset on the back wall.  We would then use the antique brass border seen at right in image to wrap around the back inset herringbone panel.  For the floor,  we actually decided to use 12″x24″ ceramic tiles that are finished to a gray/black finish like concrete.  There’s a long funny story about the floor, that we won’t bore you with, but we got it for $ .90 a square foot,  where other actual concrete tiles were $12 a square foot!

IMG_4464

Then we found the faucet!

81Eis9cBXXL._SY355_

It’s hard to see in this image, but the top of the cross bars have a white inset with a C and H on them.  They look so historical! Exactly what we wanted.  We found this one online, but had a lot of difficulty finding shower valves and heads to match.  So we went to Ferguson’s, and Kristy helped us find exactly what we wanted: a cross handle and a rain shower head.

T14097-CZLHP_H795CZ-B1


Finding the vanity was hardest part.  First, they aren’t cheap.  And second, there are a lot of options out there.  However, we were looking for a specific look and style: old piece of furniture, marble top, matte wood finish.  With those in mind, that meant that options were limited.  We found a couple of pieces from Restoration Hardware that we really liked, but as you can imagine….vanities from them  weren’t cheap.  With all of the people that we had talked to who had gutted their master bathrooms before, there was one constant in all of the conversations.  They wished they would have bought the vanity they really wanted, and not settled.  Hearing this time, time, and again, we really wanted to do it right the first time, so we were  prepared to do that, even if it hurt a little in the wallet.

Then one day, we found this vanity, and the rest was history!

bath-vanities-fairmont-142-FV36-room1We love farmhouse sinks, and never imagined finding one for the bathroom! It was immediately love at first sight.  Now we had all of the stuff, now we just needed to demo!

Ready, set…where’s the sledge hammer!

Ceramic Tile City

As we know, there are two things that sell homes:  bathrooms & kitchens.  The bathroom above would have been the IDEAL master bathroom for this house, but instead… THIS is what we bought.

IMG_4535452

A concoction of colors and patterns of years past that just screamed, “RUN AWAY FOOL!”  This bathroom was complete with the finest baby blue ceramic tiled walls, with built in ceramic soap dispensers, toothbrush holders, and toilet paper holder.  Two formal, antique gold, neoclassical sconces that flanked a built-in medicine cabinet popped beautifully off the palm tree patterned wallpaper.  It was clearly a bathroom that had been forgotten or decorated by someone with multiple personalities.  The only thing in this bathroom that wasn’t a complete disaster was the black and white ceramic floor tile.  But even that had missing grout and carpet glue residue stains.  Oh that’s right, someone put carpet in here once upon a time.  The bathroom seemed small and cramped.  Everything was wedged into place for this bathroom just so that it could all fit.

We were going to focus on renovating the sunroom first, but quickly changed our minds after getting ready in this bathroom every morning for 2 weeks.  All we needed was a little inspiration! And we didn’t have to look far for that, ready PINTEREST!